

Your rental agreement
Your contract text is yours. Toprent does not force you to use a default agreement — you replace the text entirely, per language, and the system fills in the customer, vehicle and order data as it prints.
Everything below is in Settings → Agreement.
1. Choose the agreement type
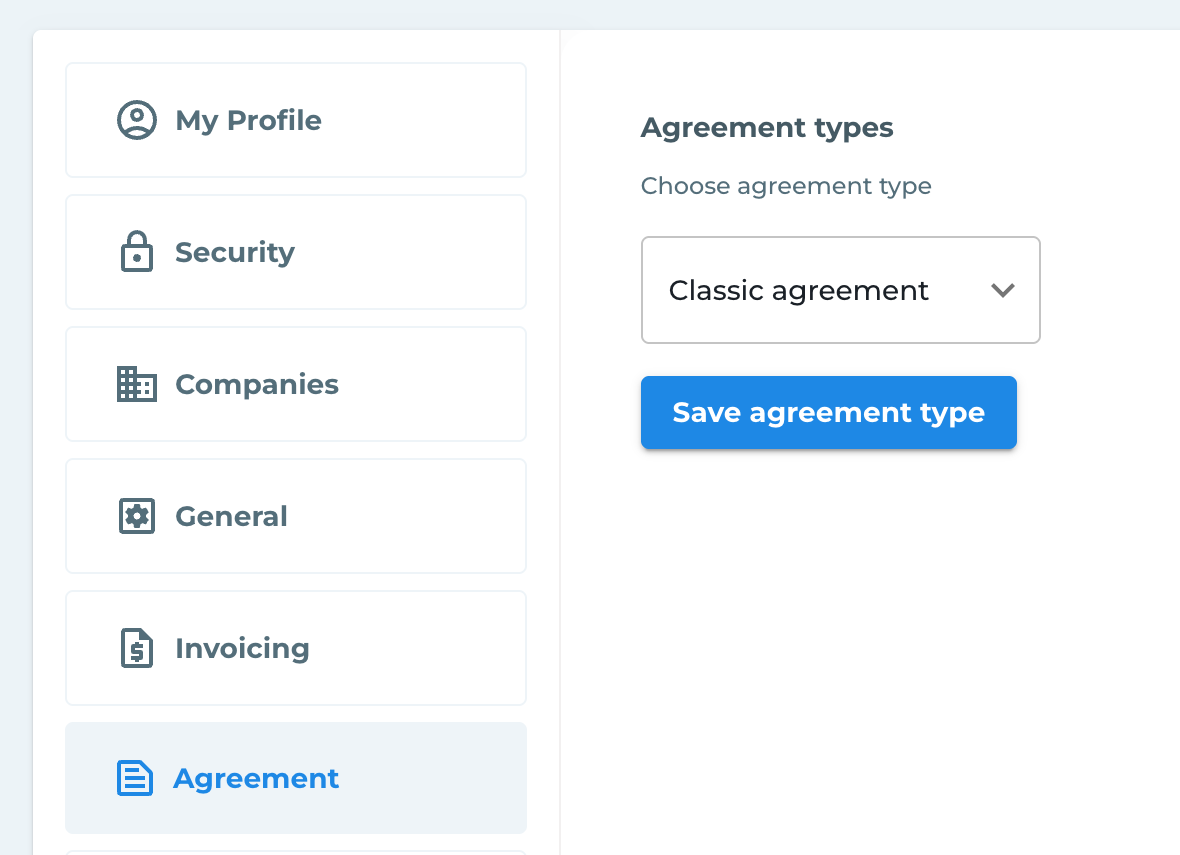
At the top of the tab, Agreement types offers two layouts:
- Classic agreement
- One image agreement
A third option, Own PDF template, appears only when support enables it for your account. It replaces the built-in layout with your own PDF. See step 8.
The screen shows preview images for the selected layout beside the selector.
Pick one and press Save agreement type. The choice applies to all newly generated contracts.
2. Choose the language
The language selector controls which language version you are editing. Each language is stored separately: English, Russian, Italian, German, French, Portuguese, Spanish, Polish, Chinese, Dutch, Czech and Lithuanian.
Editing the English text does not change the Italian one. Customers receive the contract in the language selected for the document.
3. Keep several agreements side by side
Next to the language selector is the agreement variant list. Use Add new, give the variant a name (for example Long term, Corporate, Boats), and it becomes a separate agreement you can edit independently.
When a colleague generates documents for a reservation, or sends the contract for signature, they pick which named agreement to use. The first variant is the default and cannot be deleted.
Variants are stored per language. A variant you add under English does not appear under Italian — add it in each language you sell in.

4. Write your terms
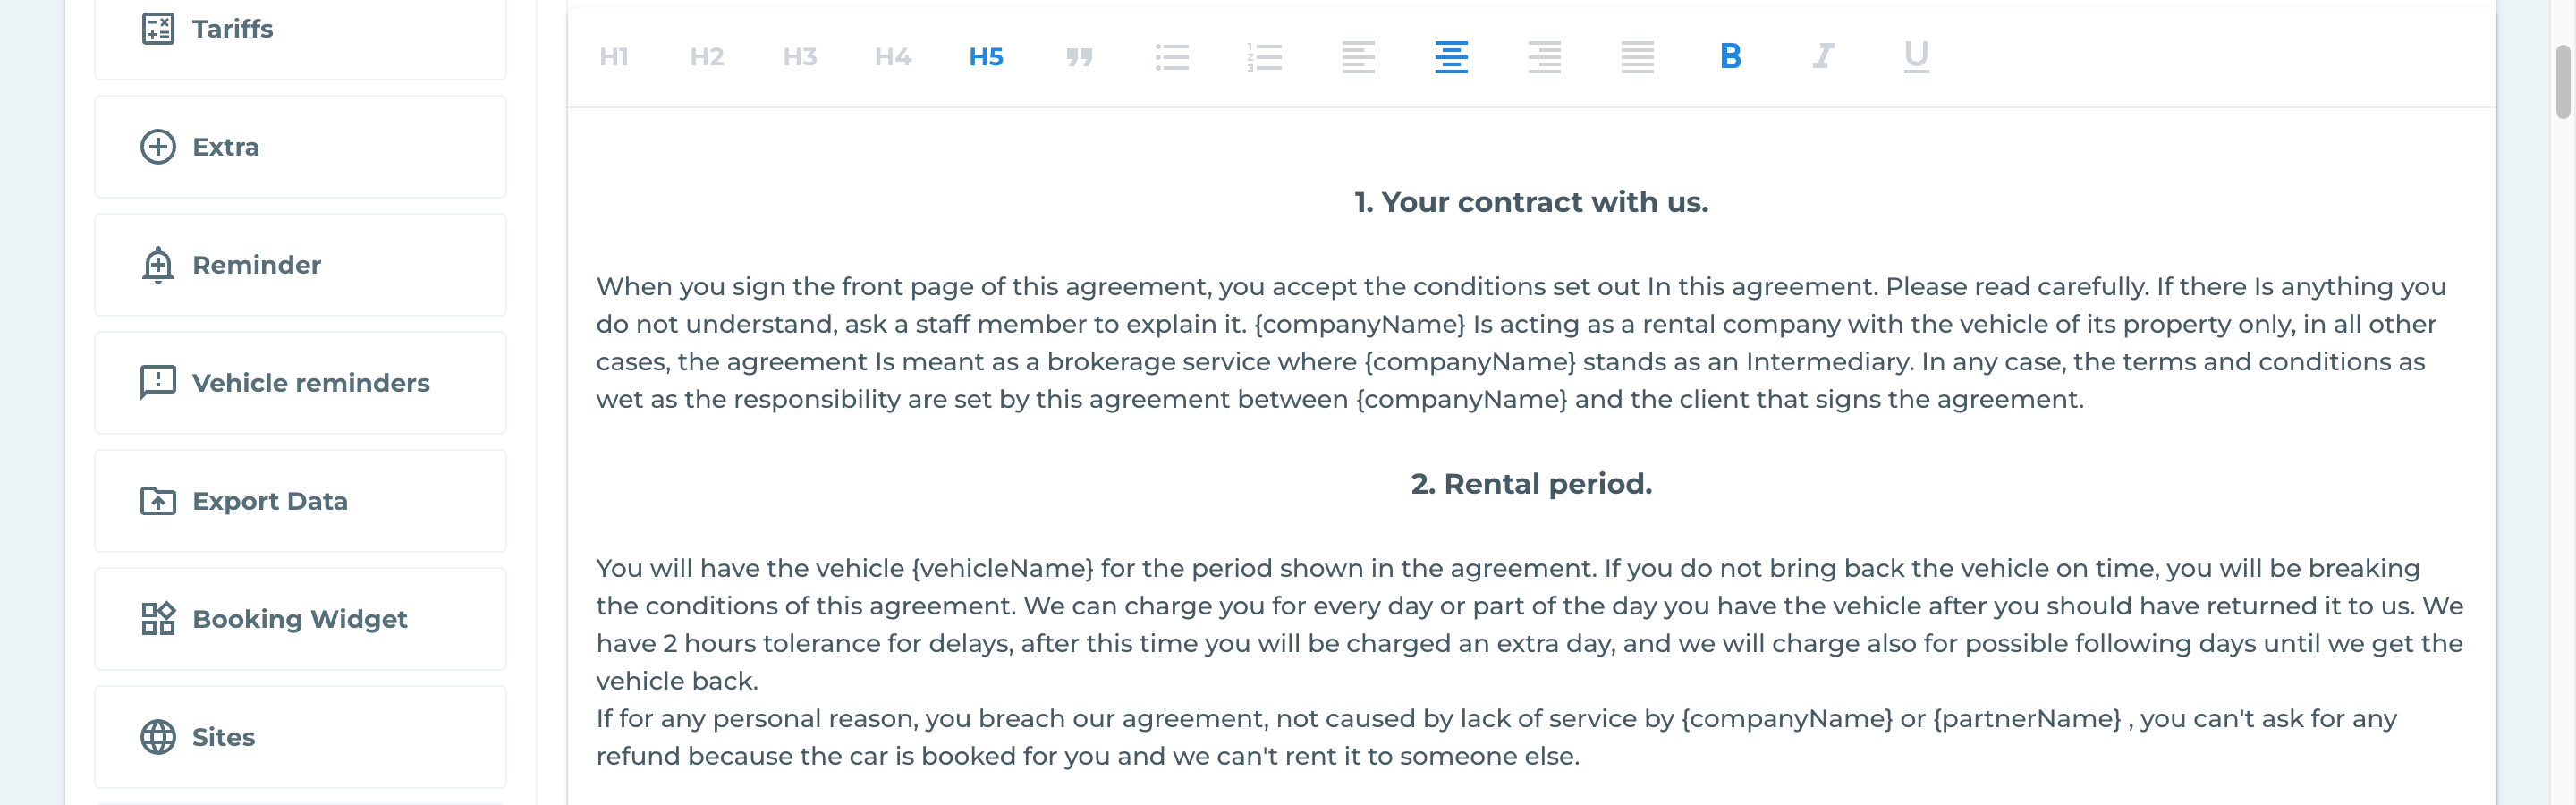
The editor is a normal rich-text editor: paste your existing agreement, format headings, bold, lists.
Press Save and confirm in the dialog to publish it. Cancel discards unsaved edits.
5. Let the system fill in the data
This is what turns a static document into an automated one. Type a tag anywhere in your text and it is replaced with real order data at printing time:
| Tag | Replaced with |
|---|---|
{companyName} | The company on the order |
{clientName} | Customer name and surname, or company name for business customers |
{vehicleName} | Vehicle, for example Mercedes-Benz S600 |
{partnerName} | Vehicle owner (partner), when the car is not yours |
{orderNumber} | Order number |
{deposit} | Deposit amount (number only, no currency) |
{franchise} | Excess (number only) — the tag keeps the older franchise spelling |
{franchisePercents} | Excess in % |
{franchiseCasco} | Excess (CDW) |
{franchiseTheft} | Excess (Theft) |
{franchiseDamage} | Excess (Damage) |
{companyWebsite} | Your company website |
{companyEmail} | Your company email |
{signature} | The customer’s captured signature image |
Tags are case-sensitive and must include the braces. A tag that is misspelled is printed as-is — a quick way to spot mistakes in a test contract. A tag the order carries no value for — the deposit, any excess figure, your website or your email — disappears completely and leaves nothing in its place.
6. Add your own designed pages
Add pages with graphics uploads finished pages as images — a price list, an insurance sheet, a page from your existing designed contract.
- Each image is scaled to fit one page.
- The pages are inserted into the generated contract, and the customer signs them along with the rest.
- Images are language-dependent: upload them separately for each language you sell in.
Use this for anything visual that the editor cannot express. Note that images are printed as they are — tags are not filled into them.

7. Set the document colour
Under You can choose the color of documents, pick the accent colour used across your PDFs, then Save. Your logo and company details come from the company profile in Settings → Companies & Users.

8. Use your own PDF contract (beta)
This feature is in beta. Contact support to get access. Until support enables it, the Own PDF template option does not appear in the agreement type list in step 1.
Send us your contract as a fillable PDF. The system types the order data into it and stamps the signatures. Your layout, your printed text and your logo stay unchanged. The system types the values in its own typeface.
What “fillable” means
Each blank in the document is a form field: a box that you can click and type into on screen. It is the same kind of PDF that a bank or an insurer sends you to complete. A PDF that only shows blank lines is not fillable. The lines are drawn, and the system cannot write on them.
How to make one
- Adobe Acrobat Pro — open the PDF. Select Prepare a form. Acrobat finds most blanks. Add the blanks that Acrobat misses.
- LibreOffice Draw (free) — open the PDF. Add a form control on each blank. Export the file as a PDF.
- Your designer or your print shop can do this in a few minutes. Send them this page.
Which fields work
- Use a text field for a value that the system types, for example the customer name or the deposit.
- Use a tick box for a box that the customer ticks.
- Drop-down lists and list boxes also work.
- Use a text field for each signature. Make the field as large as the signature must print.
Requirements
- The file is a PDF.
- The file is 10 MB or smaller.
- The file has no password.
- The file holds at least one form field.
Set it up
- Open Settings → Agreement.
- Select Own PDF template in the agreement type list. Press Save agreement type.
- Press Upload template and select your PDF file.
- Wait for the upload. The system lists each form field that it finds in the file.
- Press Suggest mappings. Wait a moment. The system reads your field names and fills in the ones it matches.
- Select the correct data for each remaining field. Check each suggestion.
- Select Customer signature or Operator signature for each signature field.
- Press Save field mapping.
- Generate a contract for a test reservation. Read it from start to end.
Give each field a name that you recognise, for example renter_name or deposit. The names are for you. You select the data for each field in step 6. Suggest mappings reads a field name in any language, so you can name your fields in your own language.
Suggest mappings is an aid, not an answer. It proposes; you decide. Check every field it fills before you save.
Limits
- The system types the values in its own typeface. The typed values do not match the typeface of your printed text.
- Each field holds a fixed space. Text that does not fit is cut off.
- Rows do not repeat. Three driver rows hold three drivers. The system does not print a fourth driver.
- The printed words in your document stay as you wrote them. The system does not translate them.
- You have one template. The system uses it for each language and for each order.
- A new upload replaces the template and deletes your field mapping. Map the fields again after each upload.
- Suggest mappings works for 150 unmapped fields or fewer. Map the extra fields by hand first.
- Damage records and the payment history do not fit a fixed layout. The system prints them as extra pages after your template.
What cannot be changed
- The first pages of the contract have a fixed structure: rental and vehicle details, insurance and deposit, payments, damages, signatures. You control the terms text, the added pages, the colour and the company data — not the position of those tables, and not which fields they contain. To control the layout itself, use your own PDF contract (step 8).
- Graphic pages stay as you upload them (step 6). The system does not type customer data into an image. A tag works only in the terms text of step 5 and in the fields of your own PDF template.
Recommended first setup
- Paste your existing terms into the editor for your main language.
- Replace the blanks in that text (customer name, vehicle, deposit, excess) with the matching tags.
- Upload any purely graphical pages as images.
- Generate a contract for a test reservation and read it end to end.
- Repeat for each language you sell in.